






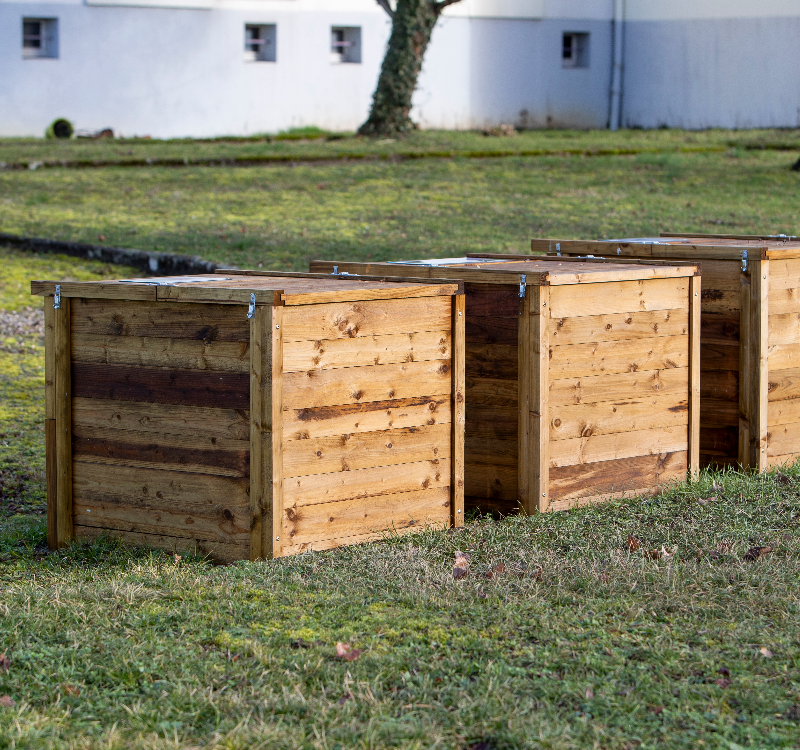
Spring is just around the corner, and with it comes the perfect opportunity to refresh your garden and prepare for a productive growing season. One of the best ways to get your outside space in shape is to create a compost bin, a practical, eco-friendly addition to recycle garden waste and enrich your soil – and we can help!
With over 50 years of experience to our name, we’re proud to be one of Wigan’s most trusted timber merchants. Offering an extensive range of premium timber, sheet materials and more, we’ve got everything you need to tackle any project with confidence. So, if you’re wondering how to build a compost bin, here’s what you need to do.
Step 1 – Find the perfect spot
First of all, you need to choose where you’re going to build your project. This is a crucial step, as the location of your compost bin can make a big difference to how efficiently it works. Morning sun or dappled light helps decomposition without drying out the contents too quickly, so we recommend choosing a partially sunny spot. It’s important to make sure the ground is level, well-drained and preferably made of bare soil rather than concrete, so excess moisture can escape and worms and microbes can get to work. Position the bin a small distance away from fences or walls to allow airflow, while keeping it sheltered from strong winds that could dry out the compost. Accessibility is important, too. Consider placing your bin near garden paths or vegetable beds, so adding kitchen scraps and garden waste is easy, and turning the compost doesn’t become a chore.
Step 2 – Choose what size you want your bin to be
You’ve looked up how to build a compost bin, you’ve chosen your site, and now it’s time to start measuring. We know it might be tempting to build a very large compost bin, but going too big can make it hard to turn the contents effectively. This can cause poor airflow and uneven decomposition, making the compost slower to break down and harder to manage. Keeping your bin at roughly 1m³ ensures it stays practical and efficient, the perfect capacity for an average-sized household.
Step 3 – Order your materials
For a standard 1 m³ compost bin, you’ll need a combination of sturdy timber for the frame, slats for the sides, and materials for a weatherproof roof. As with any outdoor project, it’s best to use treated timber wherever possible, especially for a compost bin, where moisture is constant.
You’ll need:
- For the frame:
- Four 1.2 m lengths of 50 x 50 mm pressure-treated softwood for the corner posts (trimmed to around 1.04 m)
- Six to nine 50mm x 25mm roofing battens for horizontal bracing (cut to 1 m)
- For the sides:
- 100 mm or 150 mm ungraded rough-sawn treated softwood, cut to 1 m lengths to create evenly spaced slats on all four sides. You will need approx. 4–8 slats per side for 150 mm boards, or 6–10 slats per side for 100 mm boards, ideally with 1–2 cm gaps for airflow
- For the roof:
- One sheet of marine plywood (cut to 1m x 1m)
- Mineral roofing felt
- Fixings and accessories:
- Two galvanised tee hinges for the roof/lid
- A liner (e.g. landscape fabric)
- Timco decking screws (or similar corrosion-resistant screws) for frame, battens and slats
- Galvanised garden/fabric staples for attaching liners or roofing felt
- Paint, varnish or stain for extra weather protection
Step 4 – exterior treatment
Again, we recommend using pressure-treated timber for a project like this, as it’s impressively durable and highly resistant to rot, decay and insect damage. Even so, there’s nothing wrong with an added layer of protection. At this stage, give all your timber a coat of exterior paint, varnish or stain. Covering every surface ensures the wood is shielded from moisture and the elements, both inside and out, helping your bin last even longer while keeping it looking great. If you’re going for a cohesive, stylish look throughout your outdoor space, consider matching the shade of your new compost bin to other garden features, like sheds, fencing and decking.
Step 5 – Position the corner posts
Start by positioning your corner posts upright at the four corners of your chosen spot. Space them roughly 1 m apart to give your bin the correct internal dimensions for a 1 m³ capacity. Make sure the posts are level and vertical, using temporary props or short stakes if needed to hold them in place. Once the posts are steady, attach horizontal bracing battens at the top, middle, and bottom of each side using corrosion-resistant screws. These battens will tie the posts together, preventing them from twisting or bowing, and will also provide a solid surface to attach your slats. Taking the time to get the posts square and firmly braced at this stage will make the rest of the build much easier.
Step 6 – Attach the side slats
Once your frame and horizontal battens are in place, it’s time to attach the side slats. Starting from the bottom, position each slat so it rests against the horizontal battens and the corner posts. Screw the slats securely into the battens at the top, middle, and bottom, as well as into the posts at each end, ensuring that each board is stable along its full length. Leave a small gap of around 1–2 cm between each slat to allow air to circulate while keeping the compost contained. Continue this process up each side of the bin, using a scrap piece of timber as a spacer to maintain consistent gaps. The combination of the slats and battens creates a sturdy, ventilated frame that will allow your compost to break down efficiently without compromising the structural integrity of the bin.
Step 7 – Add a breathable liner
The beauty of treated timber is its durability and resilience – but with that said, including a liner like landscape fabric will help to keep the timber even stronger for even longer. Cut the membrane to fit inside the slatted frame, then attach it gently to the horizontal battens or posts using galvanised staples or small nails. Leave the bottom open so that the compost remains in direct contact with the soil, and avoid stretching the membrane tightly against the slats. Its purpose is simply to reduce direct contact between the compost and the timber while still allowing air and water to move freely.
Step 8 – Build and attach the roof
For the roof, you’ll need a sheet of marine plywood cut to 1 m x 1m. We recommend adding roofing felt to the top of the sheet, securing it with staples or tacks to make it waterproof. You may also choose to apply varnish to the underside of the plywood to protect the wood from moisture rising from the compost. This combination keeps your compost dry while also prolonging the lifespan of the timber underneath.
Finally, attach the roof to the bin using two galvanised tee hinges, positioned evenly along the front edge. Check that the lid opens and closes smoothly, and make a final inspection to ensure that the slats are secure, the posts remain vertical, and the frame is level. Once everything is in place, your bin is ready to start filling, just in time for spring.
So, if you’ve been curious about how to build a compost bin, those are the essentials covered! With the right materials and a bit of effort, you’ll have a durable, practical, and visually appealing addition to your garden in less time than you might think. Of course, if building your own compost bin feels like too much work, there’s another option worth considering. At Sherman & Young Timber, we supply a wide range of Ecoscape products, including stylish outdoor bin storage, which offers a neat, weather‑resistant enclosure originally designed to house wheelie bins and other garden equipment. While these units aren’t made specifically for composting, they can work well as a discreet home for a plastic compost bin, particularly if you’re after something simple, sophisticated and tidy.
If you’re looking for a Wigan timber merchant you can really rely on, you’re in the right place. From timber and sheet materials to fencing and decking, we’ve got everything you need to transform your garden into the space you’ve always wanted. With premium products, competitive prices and expert guidance every step of the way, we’re always happy to help. For more information, don’t hesitate to give us a call on 01942 727 314, and get your spring garden off to a great start.


