





Whether you’re replacing worn-out woodwork at home, finishing off a room renovation, or fitting an architrave as part of a job for a customer, new trim can really help to finish off a space. It’s one of those details that might not be the first thing you notice when you walk into a room, but when it’s fresh, neat and properly finished, everything looks that little bit more complete.
If you’re an experienced tradesperson, fitting architraves may be a familiar part of your job. If you’re a DIYer, though, or you’re simply a little rusty, knowing where to start can make the whole process feel much more manageable.
With that in mind, we’ve put together this straightforward guide to take you through the process, from taking off your old architrave to adding those final finishing touches.
What is a door architrave?
Put simply, a door architrave is the decorative moulding fitted around a doorway, covering the junction between the door lining or frame and the wall. As well as giving the doorway a tidy, finished appearance, architraves help conceal small gaps and imperfections around the edge of the frame. They’re useful when finishing an interior renovation, as they create a clean transition between the door and the surrounding wall.
It’s also worth knowing the difference between architraves and skirting boards, as the two are often used together. Skirting boards run along the bottom of the wall, protecting the wall’s lower edge and creating a neat finish where the wall meets the floor. Architraves, meanwhile, are used around openings. The two can be chosen to complement one another, with matching or similar profiles helping the woodwork throughout a room feel consistent.
Step 1: Remove the old architrave
If you’re replacing existing trim, the first job is getting the old one off. We’re often asked by customers how to remove door architraves, and fortunately, it’s generally quite straightforward. Start by running a sharp utility knife carefully along the edges of the architrave. This helps cut through paint or decorator’s caulk that may have sealed the trim to the wall. Skipping this step can result in chunks of paint or plaster coming away with the old timber.
Once you’ve separated the edges, gently work a pry bar, bolster or suitable flat tool behind the architrave. Begin near a fixing point and gradually loosen the timber rather than trying to pull the whole length away at once.
If the architrave has been nailed or pinned in place, work your way along the board, releasing each fixing as you go. Take care around the door lining and plasterwork, especially if you’re working in an older property where surfaces may already be fragile.
After removing the boards, take out any remaining nails or pins and clear away old adhesive and loose material. You’ll then have a much better idea of what you’re working with.
Step 2: Measure the doorway
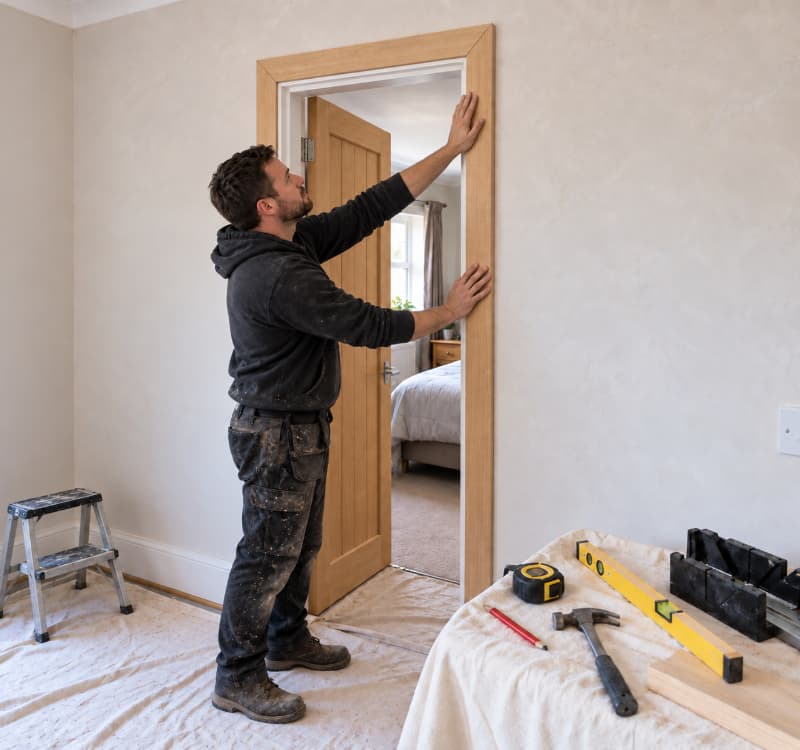
This is the stage where accuracy really matters. Before cutting your new architrave, measure each section of the doorway individually. Measure the height required for both upright pieces, followed by the width across the top. Even if the two sides look identical, don’t assume that they are. Older doorways in particular can have slight differences from one side to the other, so taking separate measurements is worthwhile.
Think about the position of your architrave, too. You’ll generally want a consistent reveal between the edge of the door lining and the outside edge of the architrave. If you’re replacing existing trim, you may be able to use the old architrave as a useful reference, although measuring the opening itself is still important.
When buying your material, remember to allow some extra length for cutting. Your measurements tell you the finished sizes you need, but they don’t account for the sections removed when creating your mitred corners. A little spare material is useful insurance, especially if this is your first time fitting architraves or it’s been a while since your last installation.
Step 3: Choose and prepare your architrave
Once you know how much material you need, you can choose the right architrave for the job. Pine is a popular option if you want the natural appearance of timber or you’re matching existing wooden features. MDF can be a practical choice for painted interiors, providing a smooth, consistent surface that works particularly well with modern decorative schemes.
The profile matters as well. At Sherman & Young Timber, we stock a selection of pine architrave profiles, including Torus, Lambs Tongue, Regency and Rounded Edge, alongside a range of MDF mouldings with options including Ogee, Square Edge and chamfered designs. When choosing a profile, think about your home, existing woodwork and personal taste.
More decorative styles like Regency or Lambs Tongue can complement traditional interiors, while Torus and Rounded Edge offer a softer, understated look. If you prefer a cleaner, more contemporary finish, Square Edge can provide a crisp, understated look, while Ogee adds a little more detail.
Before cutting, make sure your lengths are clean, straight and free from damage. It sounds obvious, but checking the material before you start can save time later.
Step 4: Cut your architrave to size
Now comes the part that requires a little more precision: cutting your architrave. For a typical doorway, you’ll have two upright pieces and one piece running across the top. These pieces are usually joined at the corners with mitre cuts, meaning the ends are cut at an angle so they meet neatly rather than forming a straight-edged corner. You’ll usually make these angled cuts using a mitre saw or a mitre box, depending on the tools you have available. If you’re new to the process, don’t worry – just take your time with your measurements and cuts.
Before you start fixing anything in place, hold the first piece against the door lining and check how it sits. This is known as dry-fitting, and it’s a useful step whether you’re a professional or working on your own home. Repeat the process for the other upright, then measure the distance between the two mitred corners before cutting your head section.
It’s much easier to make a small adjustment at this stage than after the architrave has been fixed. If a joint isn’t quite closing properly, double-check your measurements and cuts before reaching for the adhesive.
Step 5: Fix the architrave in place
Once you’re happy with the cuts and the pieces are sitting correctly, you can fix the architrave in place. The best fixing method will depend on the surface you’re working with. For example, grab adhesive can be suitable for clean, sound surfaces, while pins or nails may be preferable where you need a mechanical fixing. If you’re fixing into masonry rather than the door lining, you may need suitable wall plugs and screws instead. Always check that your chosen fixing is appropriate for both the material and the surface, and follow the manufacturer’s instructions.
Start with one of the upright sections. Apply your adhesive as directed, position the architrave carefully and press it firmly into place. If you’re also using pins or nails, place them along the board at regular intervals, keeping them towards the centre of the architrave rather than too close to its edges. This helps hold the board securely while reducing the risk of splitting or damaging the timber.
Fix the second upright in the same way, checking that the gap between the edge of the door lining and the architrave remains even. Then position the head section across the top, paying close attention to both mitred corners and making sure everything sits neatly before securing it.
If you’re a trade professional working on several doorways, it can help to label your measurements and cut pieces as you go. For a DIY project, simply taking your time and checking each section before fixing it can make the whole job feel much more manageable.
Step 6: Fill, sand and finish
Once all three pieces of architrave are securely fixed, it’s time to tidy up the details. This final stage can make a big difference to how neat the finished doorway looks, so it’s worth taking a little time rather than rushing to get the paint on.
Start by checking the mitred corners and the points where the architrave has been pinned or nailed. If you can see small gaps in the joints or holes left by the fixings, these can usually be filled with a suitable wood filler or decorating filler. Apply a small amount rather than overfilling the area, as this will leave you with less sanding to do later. Always follow the manufacturer’s instructions for drying times.
Once the filler has dried, lightly sand the repaired areas until they feel smooth and sit flush with the surrounding architrave. You don’t need to remove large amounts of material – the aim is simply to blend the filled areas into the surface so they’re less noticeable once painted.
If you’re painting the architrave, make sure the surface is clean, dry and properly prepared for the paint you’re using. MDF is particularly well suited to painted finishes thanks to its smooth, consistent surface, while pine can also be painted once it has been suitably prepared. Pay attention to the manufacturer’s guidance for primers, undercoats and topcoats, particularly when working with bare timber or MDF.
You may also notice a small gap where the architrave meets the wall. Where appropriate, you can apply decorator’s caulk along this joint to give the edge a clean, continuous finish. Smooth it carefully according to the product instructions and allow it to dry before decorating. Caulk is useful for tidying the junction between the wall and architrave, but it shouldn’t be used to disguise poorly fitting mitre joints. If the corners don’t meet properly, it’s better to check the cuts and correct the problem before finishing.
Finally, give the whole doorway a quick check. Make sure the architrave is secure, the joints look neat, and the door opens and closes without catching on the new trim. Once any filler, caulk and paint have fully dried, you can step back and see the finished result: a clean, properly finished doorway that ties in with the rest of the room.
Give your next project the right finish with Sherman & Young Timber
That’s how to fit architraves covered! It’s a job that rewards patience and accurate measuring, whether you’ve installed hundreds of doorways or you’re taking on your first one at home. Having premium materials to work with can make the process easier, too – and that’s where we come in.
At Sherman & Young Timber, we’ve been helping customers source timber, garden and home essentials and more for over five decades now, earning a reputation as one of Wigan’s most trusted timber merchants. Whether you’re picking up materials for a larger contract or planning a weekend project, our team is here to help, combining years of expertise with reliable products and unbeatable customer service every time.
Ready to get started? Take a look at our comprehensive skirting and architrave range today, or give us a call on 01942 727 314 if you need a hand choosing the right materials.